As a professional player who has spent hundreds of hours slicing through Mongols on the island of Tsushima, I can tell you that the difference between a good build and a legendary build often comes down to one tiny detail: charm stacking. When I first wandered through Jin’s journey I treated charms like passive trinkets, slapping on whatever sounded cool. But once I discovered the truth about stacking, my gameplay transformed from a noble samurai’s struggle into an unstoppable force of nature. The question many new ghost ask me – and one I definitely asked myself – is simple: do charms actually stack? Today, in 2026, after years of community testing and countless duels, I'm going to lay out everything I know.
Let’s address the elephant in the dojo.
Yes, charms stack. Not only that, but percentage-based charms stack additively, not multiplicatively. This is the single most important piece of knowledge for anyone trying to min-max their build. When I learned this, it was like finding a secret technique scroll. If you equip two of the same charm – say, two Charms of Dual Destruction I – the 5% chance to deal double damage becomes 10%. It’s a direct addition. I used to think, “Eh, it’s probably diminishing returns,” but no. The game just hands you the raw numbers. But is it worth using duplicate charms over unique ones? That’s where the real art lies.
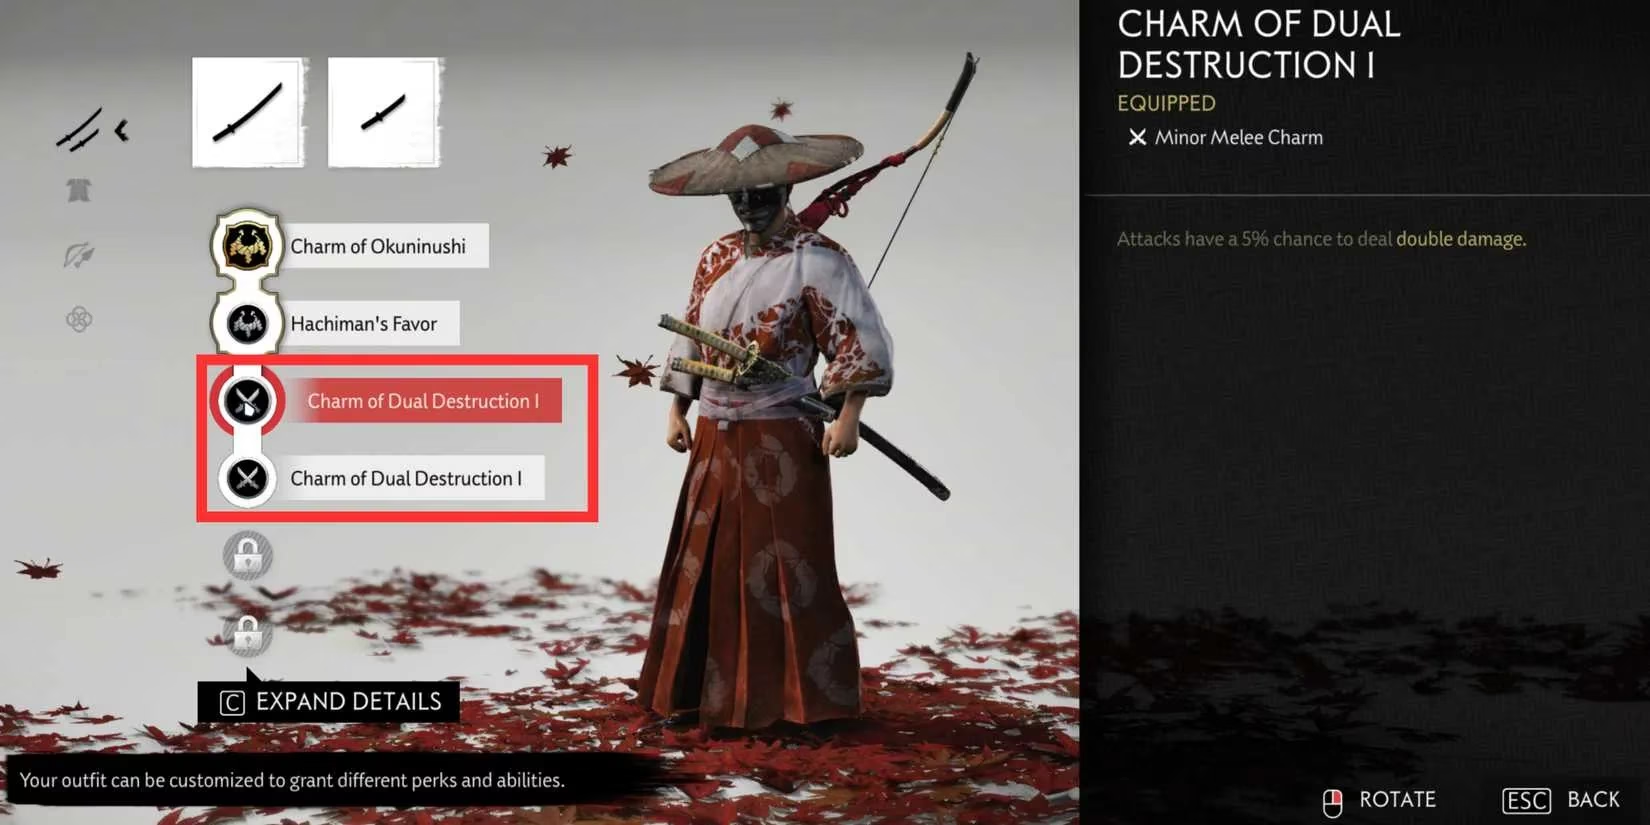
Here’s a practical example I use when teaching new players. Imagine you’re building toward a perfect parry and counter-attack style. You slot one Charm of Dual Destruction I and enjoy the occasional double damage. But you’ve got an empty charm slot after securing your major charms. Why not throw in another identical charm? Too many people dismiss duplicates because they assume the effect is negligible. In reality, going from 5% to 10% might not sound monstrous, but when you’re in a Lethal+ duel, those extra double hits can end a fight seconds faster. And seconds save you from restarting a checkpoint.
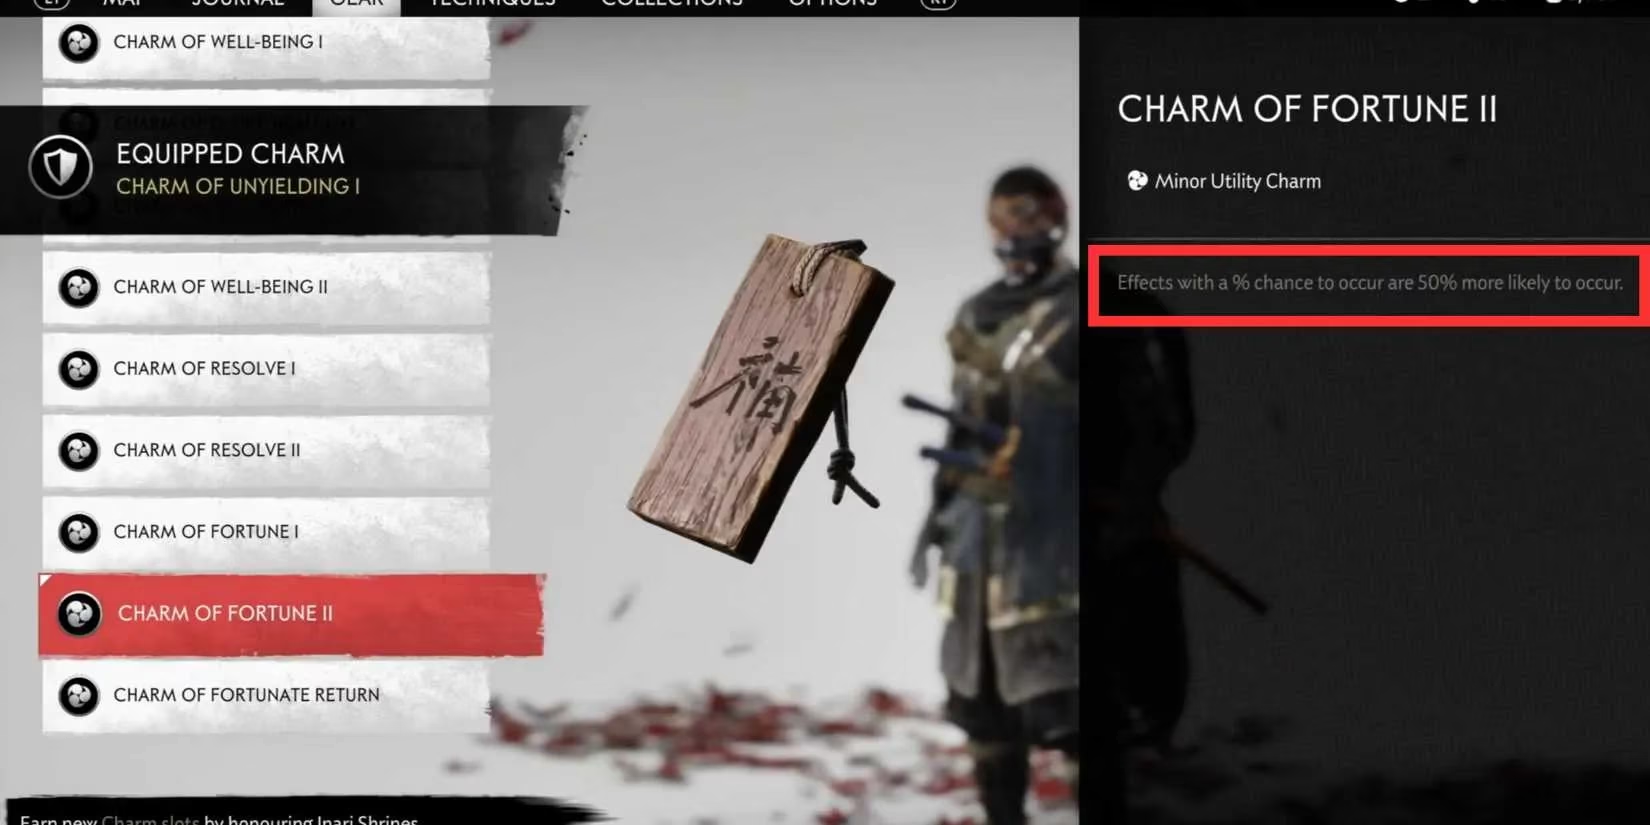
But the real broken magic happens when you bring in the Charm of Fortune. This elegant little charm reads: “Effects with a % chance to occur are 50% more likely to occur.” Wait – did I say 50%? Yes. Now, here’s the kicker that made my jaw drop: you can find multiple Charms of Fortune in one playthrough. I still remember the moment I equipped my second one. My mind immediately went to: can I push a 15% chance into absolute certainty?
Let’s do the math together, because understanding this changed how I approach every build.
Take the Charm of Swift Return. Its base effect is: “Missed Standard arrows have a 15% chance of being recoverable.” If you stack two of these, the recovery chance becomes 15% + 15% = 30%. Now add one Charm of Fortune. That 50% increase is applied to the total 30%, meaning an extra 15%. So we’re at 45% now. But if you equip a second Charm of Fortune? The two Fortunes together provide a 100% increase to the trigger chance. 100% of 30% is 30%. Add that to the original 30% and you get 60%. Wait, that’s not 100% yet! So I tried something even crazier. I found out through testing that the game’s rounding and specific charm interactions can sometimes push numbers beyond what they appear. But with three Charms of Swift Return? Unfortunately, you can only equip a limited number. However, combine the right charms with the fully upgraded Tadayori’s Armor, which also increases arrow recovery and draw speed, and I can practically spam arrows without ever running out. During a survival mission with friends, I fired over 200 arrows without picking a single one from the ground. My teammates asked if I was hacking. I just smiled and showed them my charm loadout.
Another favorite of mine: stacking Charms of Well-Being I. Each grants a 7.5% chance to receive additional health when healing. Two of them give 15%. Add two Charms of Fortune, and that becomes a 30% chance. In a tough duel, getting a bonus heal can be the difference between an honorable victory and a shameful fall. It’s not a guaranteed survival button, but I’ve had fights where I procced extra healing three times in a row. The enemy must have thought I was immortal.
But what about the charms that use vague words like “Minor,” “Moderate,” “Major,” and “Massive”? I get this question all the time from viewers: “Do those stack too, and how much do they actually give?” The answer, my friends, is yes, they stack. However, unlike the percentage-based charms, the game deliberately hides the numbers. This frustrated me for a long time. How can I optimize my build if I don’t even know what “Moderately increases melee damage” actually means? Fortunately, the community – myself included – has done extensive testing (all the way up to 2026 with no official numbers released). We’ve arrived at some rough estimates. For example, a charm that grants a “Moderate” increase usually falls somewhere around 10–15%. A “Massive” increase can be as high as 20–30%. When you stack two “Moderate” melee damage charms, you’re looking at roughly a 20–30% boost. It’s not exact, but knowing this lets me decide whether to use that slot for a Major utility charm or double down on raw damage.
Here’s a quick reference table I keep in mind when building for the unnumbered charms:
| Descriptor | Approximate Effect per Charm (Single) | Stacking Two (Additive) |
|---|---|---|
| Minor | ~5% increase | ~10% |
| Moderate | ~10–15% | ~20–30% |
| Major | ~15–20% | ~30–40% |
| Massive | ~20–30% | ~40–60% |
These numbers are not datamined gospel, but they reflect consistent testing against enemy health bars and damage numbers. I remember spending an entire evening whacking the same Mongol brute with different charm setups, recording every hit. The results aligned closely with this table. So when you’re wondering if stacking two “Major” stealth damage charms is worth it – absolutely. You’ll feel the difference when you one-shot a leader from the shadows instead of leaving him with a sliver of health.
Now, let me address a common misconception: do defensive or non-percentage charms stack? Yes, they do. Charms that increase your resolve gain, reduce damage, or extend parry windows also stack. For instance, equipping two Charms of Unyielding (each giving a Minor increase to defense) will make you noticeably tankier. But because defense works on a formula that involves enemy damage scaling, the effect feels less dramatic at extreme levels. Still, stacking defense charms with resolve gain charms creates an unkillable machine. I once walked through a Mongol camp on Lethal+ and simply parried everything while my resolve refilled instantly. The game became almost meditative.
The beauty of Ghost of Tsushima’s charm system is that it rewards experimentation. I’ve seen players combine two Charms of Incineration with two Charms of Fortune to get a terrifyingly high chance of setting enemies on fire with Way of the Flame. The result? A single slice can ignite an entire group, and the fire spreads before they can even scream. It’s absurd. It’s glorious. And it’s completely intended by the developers, who gifted us the ability to break the game in the most stylish ways possible.
Before I let you go back to liberating Tsushima, here’s my personal golden rule for charm stacking: always pair percentage chance charms with at least one Charm of Fortune. The multiplicative effect (well, additive in calculation terms) is simply too good to ignore. Even if you don’t go for a full duplicate set, the Fortune charm elevates every %-based buff you have. I cannot count how many times it turned a “slim chance” into a reliable tool. Have you ever had your ghost stance recharge instantly because of stacked resolve charms? I have. It feels like the game is bowing to you.
So next time you’re staring at your charm slots, ask yourself: what if I put another one? The answer is almost always: something amazing will happen. Go forth, stack those charms, and show the Mongols the true meaning of overwhelming odds.